Description
A light and semi-sweet chocolate chip butter cake made in the Instant Pot.
Ingredients
Scale
- 2 cups all-purpose flour
- 1 teaspoon baking soda
- 1 teaspoon baking powder
- 1/2 cup (1 stick) salted butter, room temperature
- (or unsalted butter + 1/4 tsp salt)
- 1 cup granulated sugar (if you like a sweeter cake you can increase to 1.5 cups or 2 cups max)
- 2 large eggs
- 1 cup sour cream (sub: plain unsweetened yogurt)
- 1 teaspoon vanilla extract
- 2/3+ cup chocolate chips, preference (we use mini Ghirardelli chips)
Instructions
- With a stand mixer or hand mixer whip the butter, sour cream, and sugar until creamy and fluffy. This takes about 5 full minutes at medium-high speed.
- Mix in the eggs and vanilla
- Sift in the flour, baking soda, baking powder
- Gently fold in the dry ingredients with a wooden spoon or silicone spatula until it is just incorporated into the cream mixture. Don’t overmix.
- Gently fold in the chocolate chips
- Pour the batter into a greased and floured IP bundt pan. The flour is important as it helps to seal the edges of the cake!
- Pour 1.5 cups of water into the stainless steel pot of your IP followed by the trivet.
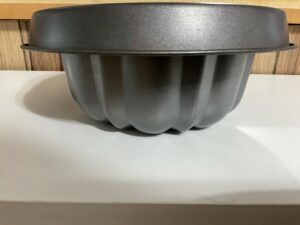
- Place the cake on the trivet. Cover with a lid* or foil (see notes below)
- Ensuring that the sealing ring is properly in place, close the lid and the venting knob.
- Cook on MANUAL/HIGH PRESSURE for 28 minutes.
- When the cooking time is complete, allow a full natural pressure release.
It may look a little damp on top as soon as it’s done, but it dries right up after a few minutes. Just flip it out of the pan onto a plate and it’s perfect!
Notes
You can tightly secure aluminum foil as a make-shift lid, however I opt for a stainless steel shallow cake pan flipped upside down and draped over the bundt pan as a lid. This also makes it easy to flip the cake out of the bundt pan using the lid (see blog post for details)
